SLOPING OFF...
...the Newsletter of Christchurch and District Model Flying Club for...June 2024
Sea Fury Slope Soarer
By David Bicker
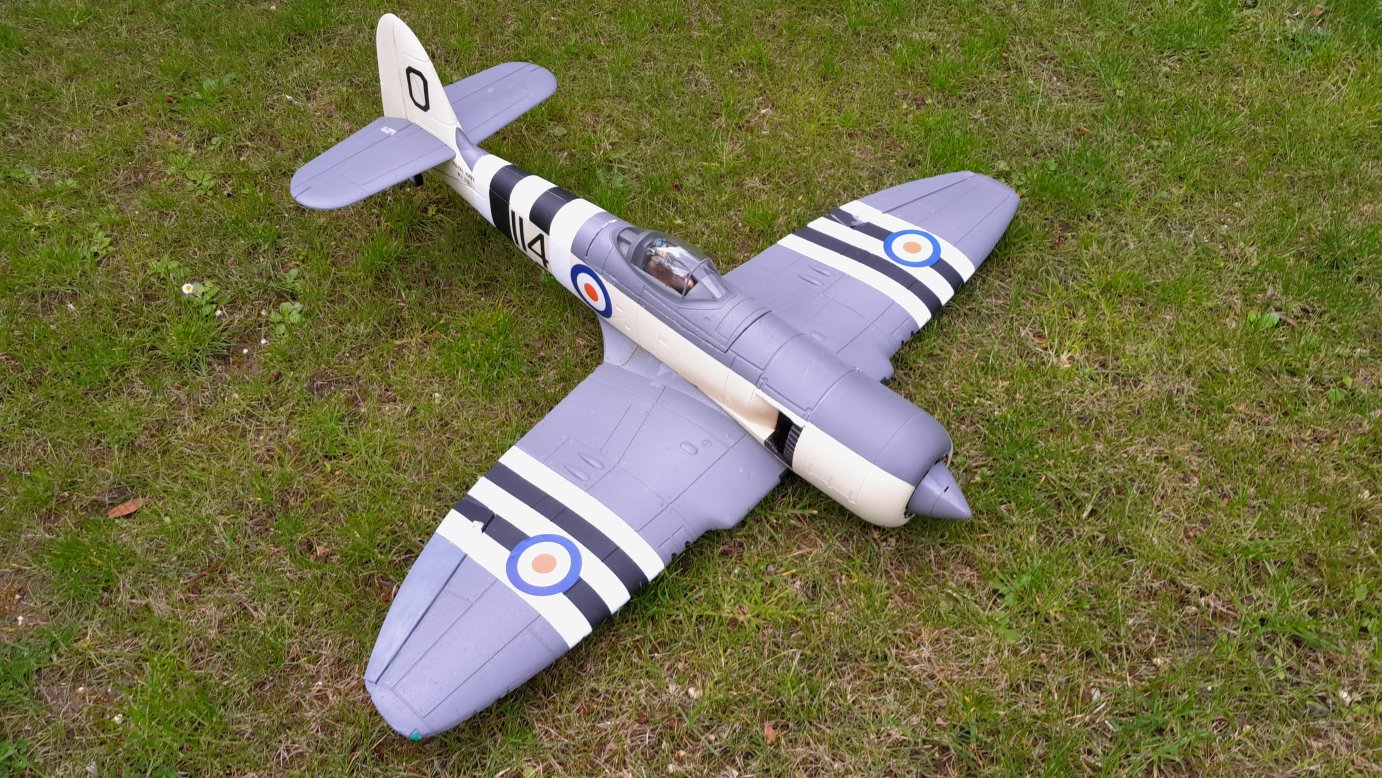
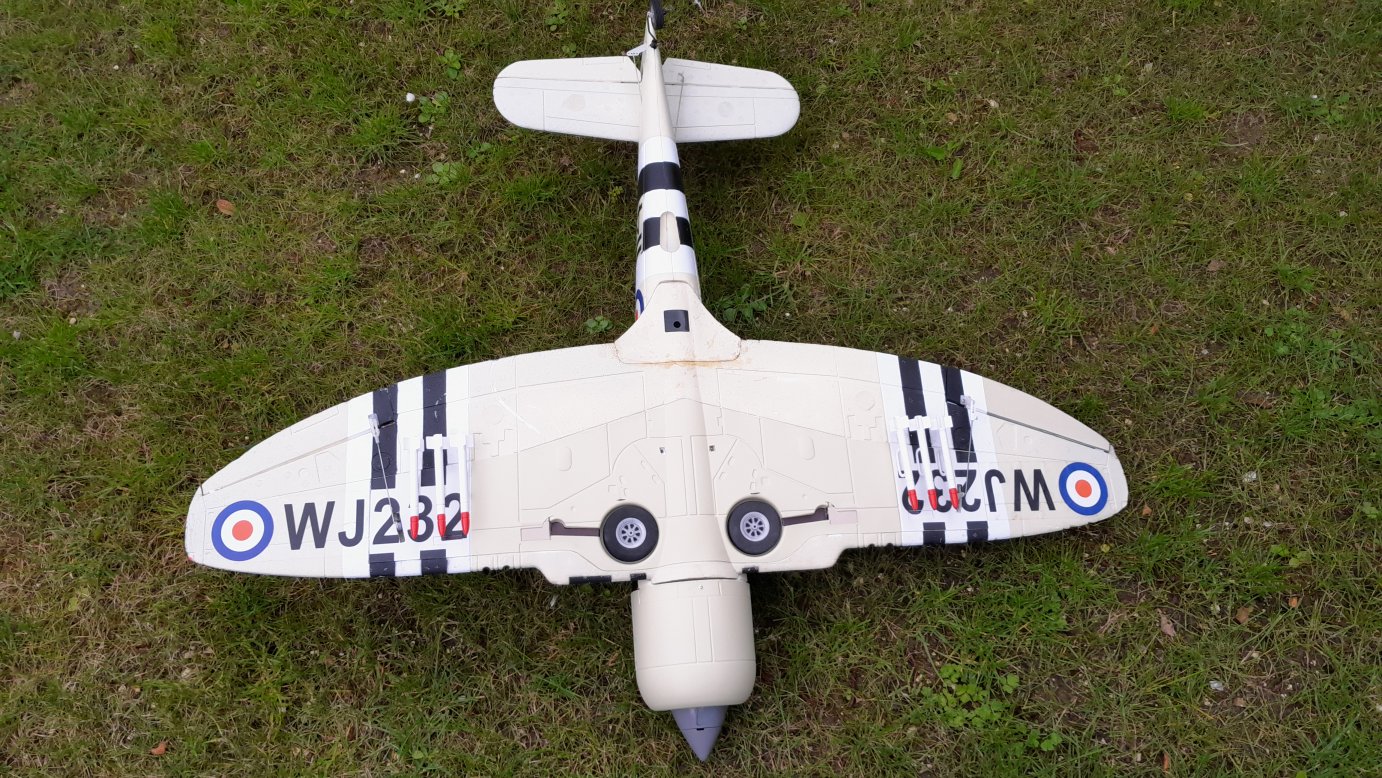
As usual, I had intended to avoid the club’s bring & buy sale as it invariably ends up with me buying something! Then I talked myself into going because I wanted to look for something suitable to use as wing joiners on my Aviafibre canard project (currently stalled).
There were 2 fairly small wingspan “foamies” that were for sale, Nick Funnel & I discussed the practicality & viability of trying them out as slope soarers. Nick ended up buying the similar sized Kittyhawk (possibly Hobby Zone) for £20. The E-Flite Sea Fury wasn’t actually on display, but leant up against the back of a table, so I think that many people had walked past it and not noticed it. The seller was John Campkin.
After walking around the room several times, I eventually gave in & went to investigate the Sea Fury box. It was a “foamie” with a 41” wingspan. It was missing one aileron & its linkages but had the rest of the servos etc intact. After a discussion with John I gave away the prop, motor & ESC to a club member for free & John accepted £10 for it.*
On getting it home I removed the mechanical retracts & their servos, blanking off where they would have dropped out of the sheet plastic cover that was supposed to fit onto the underside. I say supposed to, because it was very flimsy & was held onto the underside with small strips of totally unsuitable Velcro. The manufacturer had made little recesses for the Velcro to fit into the foam wing, but as the sheet was so flimsy there were always areas of the leading edge of the panel that hung down & would have probably got peeled back at speed. So after the retract removal & testing the remaining servos, I decided to take a leap & to use Roket odourless foam-safe cyano glue to bond all of the perimeter in place. If the aileron servos need attention I’ll just cut a small square of the sheeting out around them for access.
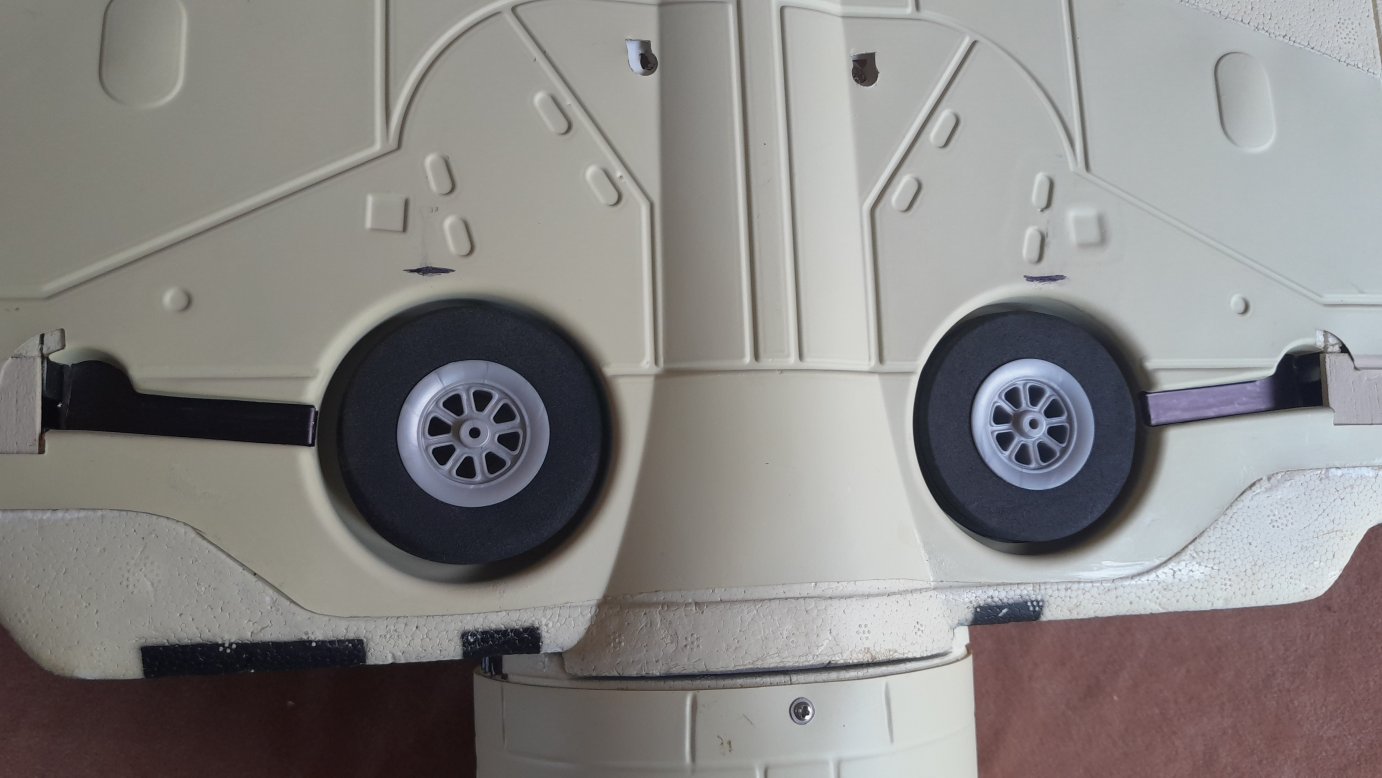
That done, & with the retracts no longer there, I painted in the wheel struts slot black to represent the struts & spot glued the wheels & tyres into the wheel recesses.
I made an aileron up from a laminate of balsa. It’s pretty thin, so I thought that would cut down flex/twist. The colour scheme was made up of low temperature iron-on film in black & white. The grey was some water based artist’s paint from The Range for about £2
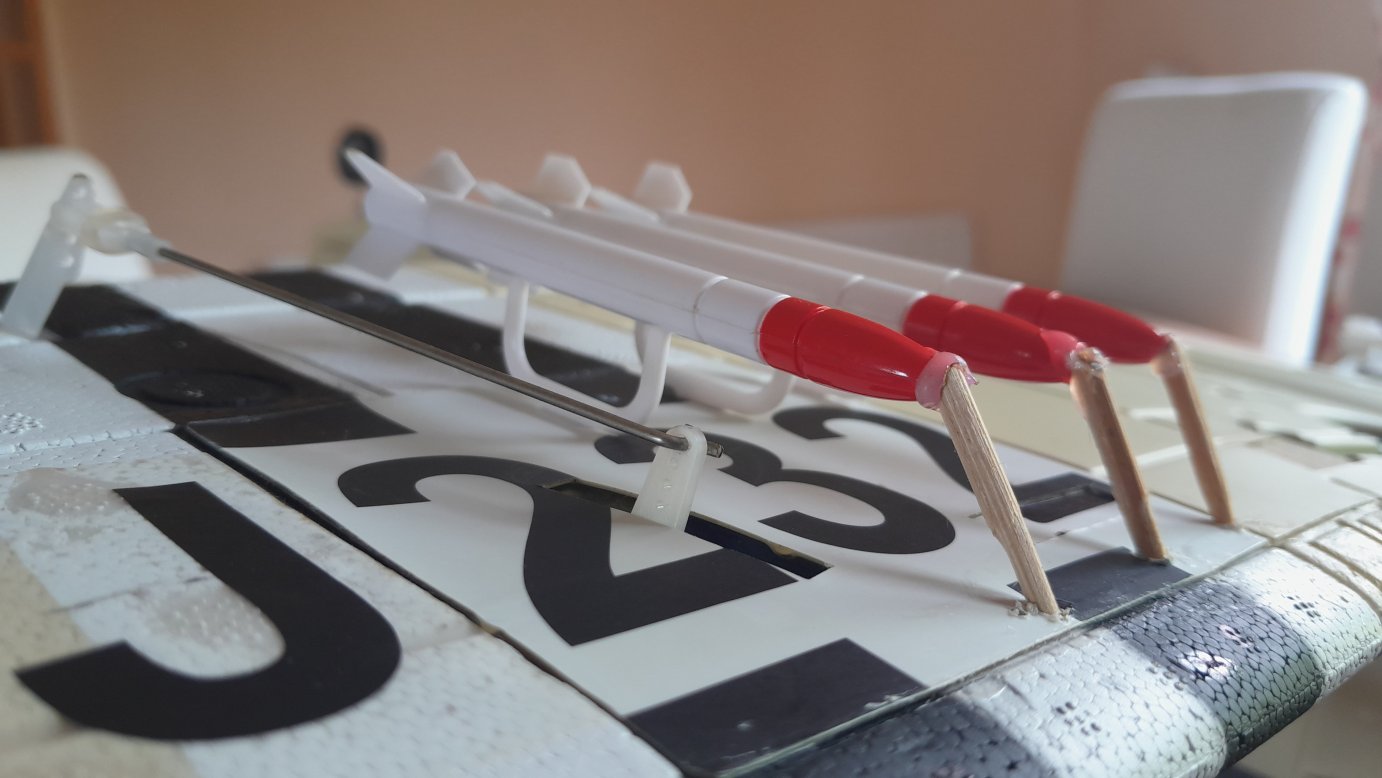
The kit came with 6 wing-mounted rockets & had mounting pylons with pre-marked slots in the cover sheet & the foam under it to locate them correctly. I went against general advice that they wouldn’t last the first landing & fitted them. Mindful that they had right angled edged fins & a pointy front end that were both likely to aid in their demise on landing in long grass, I devised a cunning plan. I cut the lower rocket tail fins to a 45 degree angle & then added a thin wooden dowel, sloping up from the nose of the rocket & buried at about a 50 degree angle into the underside of the foam wing. It looks a bit odd close up but can’t be seen when in flight. But it does prevent the rockets from being knocked off whilst belly landing. They also protect the aileron & servo horns & linkage from any landing damage.
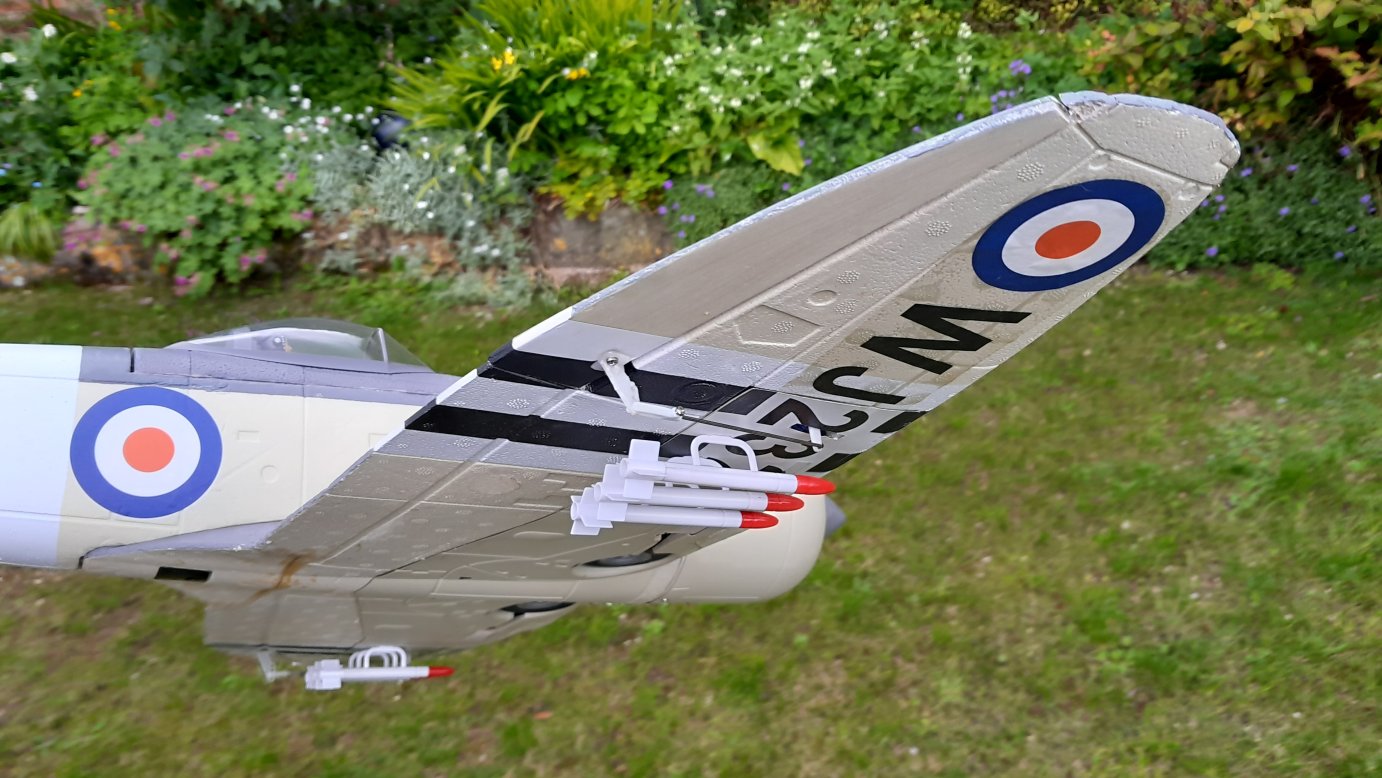
Moving on to the topside & front end next.
With the power train removed there’s a vast cavity behind the slide-off nose cone section, so, as all of the weight of the motor, etc was missing I fitted a 2000mAh NiMh square battery pack, Velcro’d to the bulkhead.
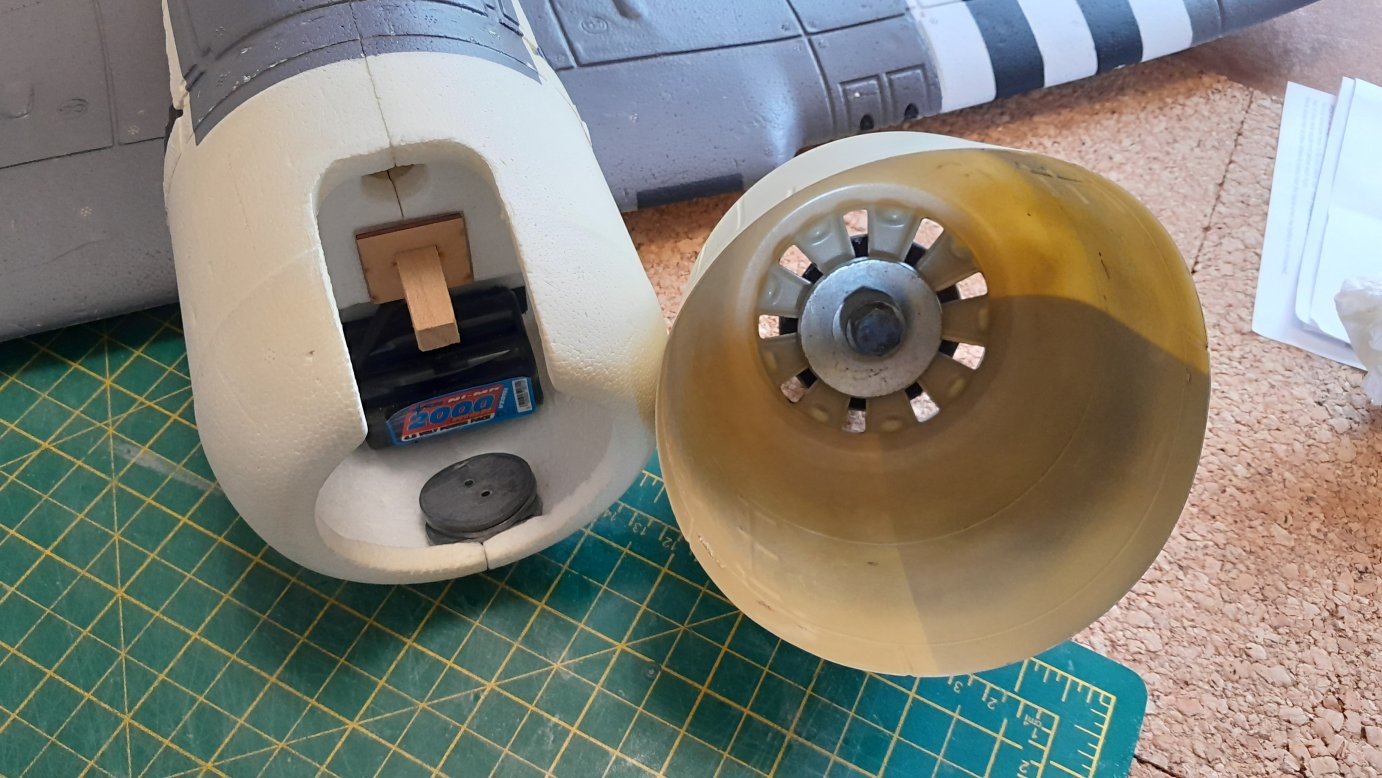
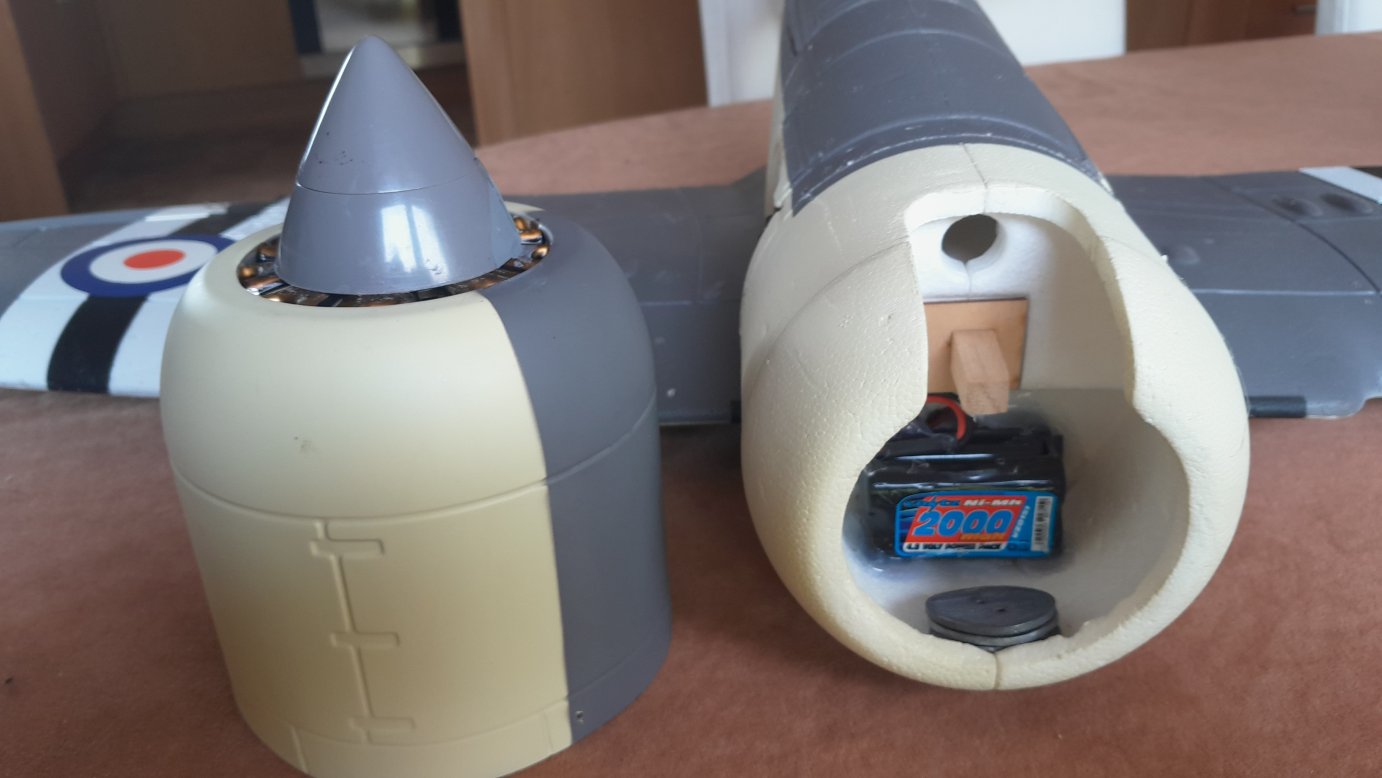
The nose cone cowl is fairly flimsy when off the model, but solid & rigid when slid onto the front of the foam fuz. I wanted the spinner fitted, but not a prop, so I blanked off the prop slots in the spinner with cardboard & painted them grey. Damaged areas on the fuz & the replacement aileron were painted too.
To balance the plane I could afford a fair bit of nose weight, so I tapped an M8 thread in the back of the spinner & fitted a heavy M8 steel bolt through the cowl with a 2” mudguard washer to spread the load, then the cowl slides over the front of the fuz & is now held in place with 3 discrete servo screws. It is already slid back as far as it can go, so a hard landing can’t push the cowl back any further.
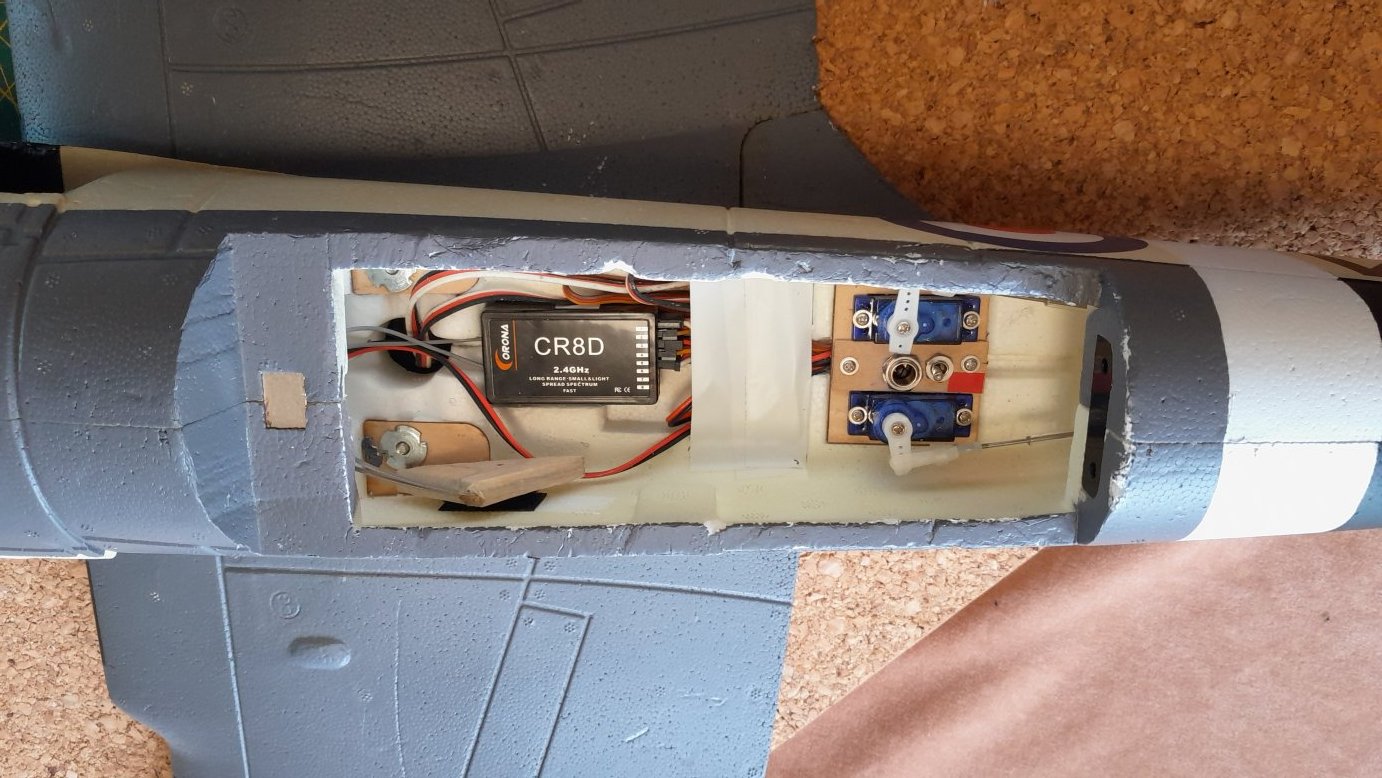
An 8 channel RX was fitted, along with a charging port & an ON/OFF switch in the servo tray.
The wing can still be removed by undoing 2 long, thin screws on the underside. I am leaving it in place because I don’t want to be forever feeding the aileron leads through & connecting them up to the RX. But it may aid in repairs if the need arises in the future.
Final balancing
Some advice had been given that it might need more nose weight than a powered version, but I decided to stick with the marked CoG. It’s one of those models where – like the Zagi, when it’s balanced & you let the tail drop a bit – it balances tail-down. But when you try the same & tilt it slightly forwards of level flight – the same happens & it tilts forwards. So a knife-edge balance point is how I’d describe it.
I have a source of round lead discs from my wife’s curtain making hobby. It only took 4 of those 1” lead discs as far forward as possible to balance it.
Finished & balanced it weighs in at 700g. The recommended range on the powered build instruction leaflet is 710g-850g depending on the power train used.
Maiden flight on 15th May 2024
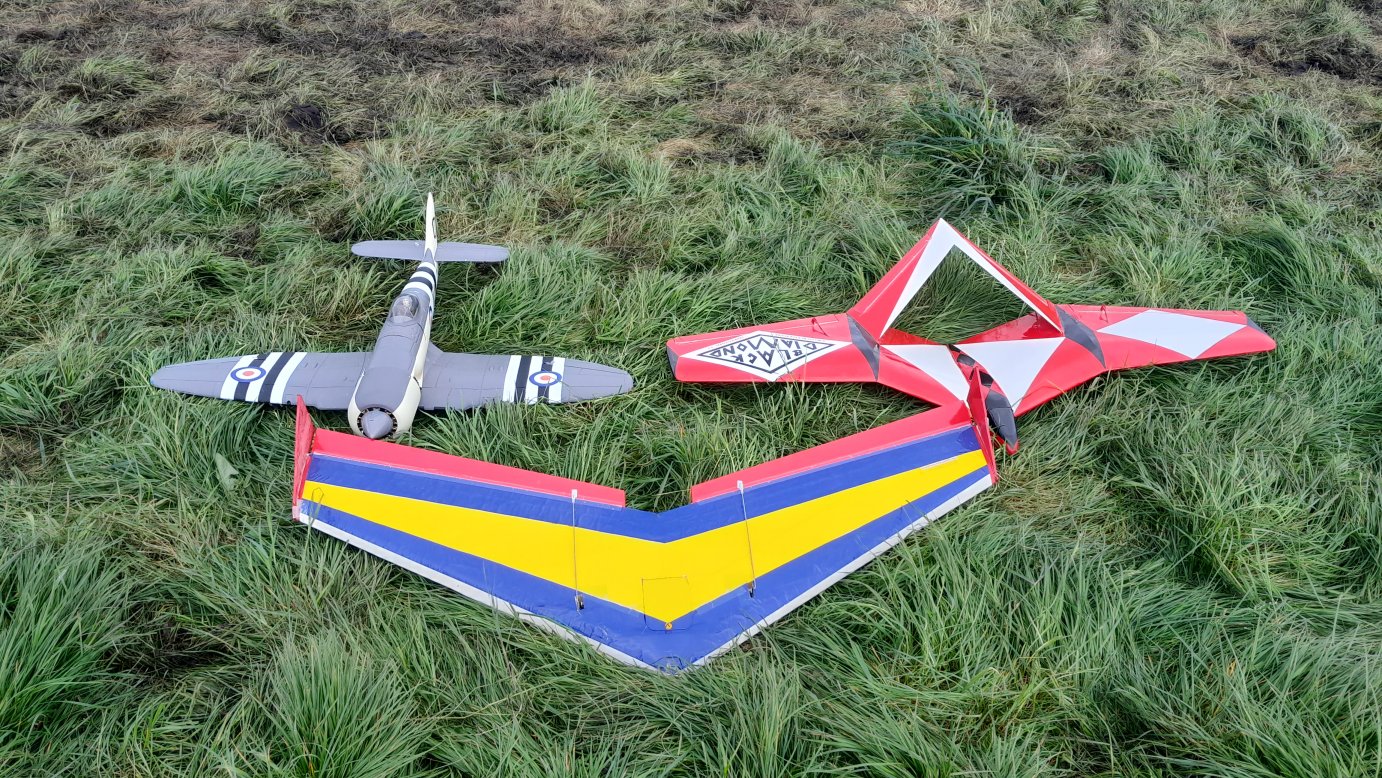
Ideal conditions at East Creech (SE) site. There was a window from 10am to 3pm that day where the wind was bang on SE, directly up the slope at around 15mph. Some of the usual suspects turned up for the session & I also brought the Black Diamond for an outing, as well as the Zagi.
I flew the Zagi first to check out the lift. Wind conditions were perfect. One of those days when you can get really low after a bit of looning around the sky & know that the model will simply float back up to a sensible height with virtually no input.
Next, I flew the Black Diamond for an enjoyable 20 minute flight and decided that it was time to try out the Sea Fury.
I really wasn’t sure what to expect on its first flight, so Nick Whittaker offered to launch it for me. It went away from the slope straight & level & then immediately started to climb. Looking good! After I relaxed a bit the aileron inputs became a bit less twitchy. I had set up a rates switch to reduce them to ½ travel, just in case it was too extreme, but after a while of trying both setting I decided that the full travel was fine. The elevator was fine, but the rudder works, but with limited response. After a short while I realised that I just wasn’t using the rudder at all – unless I made a big effort to do so. It really wasn’t needed. Also it soon became clear that it flies much better at a fair speed & starts to look scale.

Low passes & shallow dives along the slope got several comments of approval as did passes higher up with the clouds as a background. It looks realistic as long as you don’t dawdle, when it can get twitchy.
Landing time came after 25 minutes of very enjoyable flight. It landed smoothly without tip stalling, but stopped fairly abruptly in a big tuft of grass. There was a rattle in the nose cone when I picked it up (no damage to the rockets!) & I assumed that the lead weights had come adrift. But on inspection the battery pack had un-Velcro’d it’self from the bulkhead. I have resolved this by fairly liberal use with a hot glue gun & the pack is now solidly held in place.
I look forward to Nick Funnel’s conversion of his Kittyhawk to a sloper. Nick also already has a much bigger Vulcan that he has successfully sloped at Win Green. So we are building up a fleet that will look great in the sky together!
PS: I hope to get better pictures of the Sea Fury in flight soon!
PPS. Maiden witnessed by Club member John Campkin (the original owner), who was sitting as a spectator in a car parked behind the slope at East Creech and saw the Sea Fury's successful maiden flight.
(*In view of the fun David had with the model and the success of the flight, he added a further £10 to John C! - Ed)