
"What's that called?" I asked Brian at one of the earlier
indoor meetings. In his usual very modest way he replied "Oh,
it's something I designed myself." To my mind his model was
flying as well as, if not better than, most of the other models
darting about the hall. At that time I was attempting to hone
my indoor flying skills on the ubiquitous Pico Stick, a reasonable
product but, in my opinion, not the ideal first indoor model,
especially in restricted areas. I wanted to know more.
Basically, Brian had designed his model to use the Pico Stick components, although when I first saw it flying it was being powered by a slightly more powerful Ikarus motor. I had a Pico Stick and it wasn't long before I got hold of a copy of Brian's design to complement it, allowing building to commence.
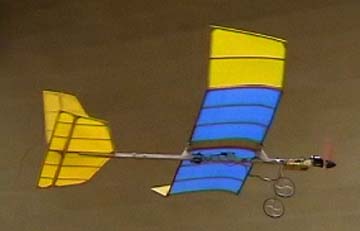
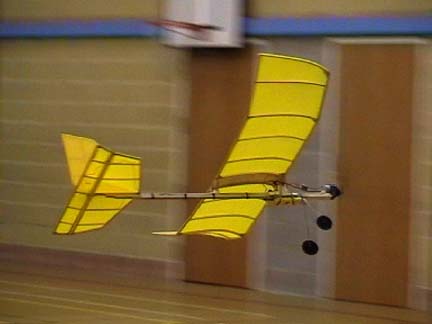
The model has a wingspan of 36" and area of 2.25 sq.ft., which together with its AUW of approx 7 oz, gives a respectable wing loading of 3.1 oz / sq.ft. Constructed of balsa, the flying surfaces have an open structure with a Litespan covering (more on this material later!). As already stated, most of the Pico Stick components are used, including the undercarriage, leaving only the basic airframe gathering dust on the shelf.
I decided to try and take some weight out of Brian's design, a decision that did cause me some trouble as building progressed. Instead of a solid balsa fuselage , the rear section of my model is a hollow box construction, the wing spars and ribs are 3/16" instead of 1/4" square and the tail and fin material has been reduced from 1/4" sq. to 1/8" x 1/4". I'm sure these decisions did save a small amount of weight but preventing warps during the covering stage proved to be quite a problem. Therefore in hindsight, I wish I had retained the material sizes chosen by Brian. It would certainly have saved some time, frustration and expensive covering material.
 As stated, the fuselage/ wing
supports can be made from simple solid piece of 1/2" x 3/8"
balsa with the nose suitably modified to accept the chosen motor.
Alternatively, using 1/16" and 1/8" sheet /strip, a
box section can be formed for both the wing supports and rear
2/3 of the fuselage structure. Simplicity is the order of the
day when it comes to accommodating the Rx, ESC, batteries and
servos; a few bits of balsa glued in the correct position are
all that is required, ensuring in the process, that the C of G
finishes up approx. 2.5" back from the wing leading edge.
The polyhedral wings are fairly straightforward, however the heavily undercambered ribs are best laminated if they are to withstand the rigours of indoor flying, namely attacks by demented IFOs or badly positioned walls. Brian lent me a jig he had produced to clamp the required number of 1/16" pieces of balsa together (in my case 3), which after being glued and left overnight to dry, were cut into 3/16" wide ribs. It worked perfectly. Assembly of the wing after this was simple , the mid section being constructed first and then suitably supported whilst the polyhedral ends were added, reinforced by 1/32" ply dihedral braces.
Nothing need be said about the tail and fin since they are simplicity itself, being just a few bits of balsa strip glued together. What could be easier?
Now the hard bit - covering. I knew nothing about Litespan before this moment but had assumed it was similar to Solarfilm. Wrong! Solarfilm is easy to apply whereas Litespan is a !!!!!!!!!! Eventually I did manage to finish the job, but not without covering the floor with acres of discarded remnants of this !!!!!!!!! material. Perhaps this is where a more rigid structure would have proved less troublesome in resisting warps during the heat shrinking process. Having said this, I am sure there are many of you in the Club who have found this material easier to use than I did. Any advice would be gratefully received. (If there is enough interest, we could arrange a demo one evening. Only if you say you want it, though - Ed)
The job done, it was time to do a bit of flying. With a couple of fully charged 7 cell battery packs, a 9x4.7 prop up front (ex Pico Stick), it was off to the first available indoor meeting. As expected, there were no real surprises, a short run and into the air - a bit twitchy I thought but more to do with the walls closing in very quickly (even with a very slow flying model). After the first circuit things settled down a bit and I have to say that Brian's design really lived up to my expectations.
The model has now been flown at many meetings and has proved
very durable, withstanding a few attacks "from the sun",
one or two walls and the occasional heavy landing. The flight
performance, although adequate, has recently been improved with
a 10x4.7 prop. This model has no real vices if set up correctly
and has proved to be an excellent introduction to indoor R.C.
flying. Well done Brian, and thanks! It's a pity
that some of the kit manufacturers don't produce models that fly
as well as this one.
It is interesting to note that my success with Brian's design has given me the confidence to progress to an indoor aileron model and to this end the Depron "Und Nu" featured in the last Sloping Off has now been built and flown very successfully.
Oh yes, the Und Nu is my third model to use the Pico Stick components, allowing me to tell "Her indoors" what good value the original purchase was. Got to make the point when you can!
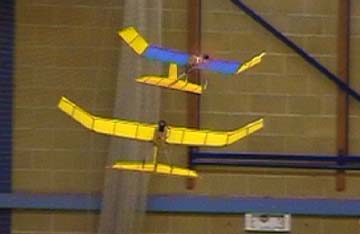
(All the photographs in this article are frame grabs from a few minutes of video footage shot at our October Oakmead flying session. There were times when the sky seemed so full of these models that there was barely room to swing an IFO! - Ed)