Sloping Off - September 2004
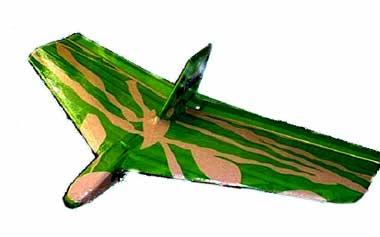
Wild Thing
Kit Review by Terry Sullivan

As a newcomer to model flying, I have a serious problem. I suffer from Arthritis from head to foot, and have not been able to work for several years. So, grateful as I am for the dosh all you kindly taxpayers give me, it doesn't afford too many luxuries. I can't just go down to the model shop and say "Give me one of those". I therefore began shopping on E-Bay, and it produced some curious results.
One of these was a complete un-built kit "Wild Thing" by SAS. I had been flying a friend's "Zagi" at a cliff top site on the buddy box and really enjoyed it. So when I saw the "WT" on Ebay, I jumped in. I am told that the "Wild Thing" is a little more stable than the "Zagi", plus having a fuselage will be easier for me to hold when my Arthritic hands are playing up. So it should be better for me to learn how to crash gracefully and only when I want to.
The first thing that I noticed was the lack of instructions in the pamphlet labelled "Instructions". I could not make a lot of sense of some parts. So I emailed SAS. The reply from Alan Head, the designer, was an invitation to ring him, despite the fact that I had told him I had bought second hand and therefore made no contribution to his Bank account. Long distance phone calls are outside my budget, so I emailed back and asked him about the leading edge. It arrived with the foam square cut but the instructions say to "round it off", but do you round off equally top and bottom? The answer came back that the leading edge is not critical, just do the same both sides. So, following advice from a club member, I drew a guideline along the flat section and rounded it off. I happily sanded and smoothed the EPP and started the Cross weave taping. This requires at least five fully functional hands, and with my two less than perfect ones was impossible to get absolutely perfect. If you have access to someone who really makes the Christmas presents look good, get them to do it!
The next stage is fitting the Servos. I was using a couple of servos given to me by a friend, and I removed the mounting lugs and fitted them into the cut-outs. This showed up something else not mentioned in the instructions they would not go in all the way but caught on the cable where it goes into the servo. This was resolved by warming an old scalpel blade on the cooker jet igniter and melting a slot for the cable to fit in to. The servos were then put in place, not taped in as yet. Having tried to bend the z-bends in the control rods with a pair of pliers, I was happy to accept the offer of borrowing a tool to do the job.
Next came the Elevons. The parts supplied are Corex, but on the advice of my Zagi flying friend, I replaced this with Balsa, as it does not flex as much. The instructions for fitting the tape hinges seemed complex, but worked. It seems awkward to fold the elevon back over itself but it works, but an extra pair of hands is useful here. The change of materials also solved another little snag- I had no idea what the instructions meant by cutting up little bits of 3mm square balsa and stuffing them up the flukes. Flukes are what happen when Ronaldinho mis-hits a free kick and it sails over David Seaman's head. They are not the gaps in Corex. That is the wing done for now, and the preparing and taping of the Fuze is straight forward, if a little untidy in places.
To be continued in the next issue.....