|
|
||||||||||||||||
|
Christchurch and District Model Flying Club |
|
MULTIPLEX FUN CUB SCALE PAINT JOB By mike roach
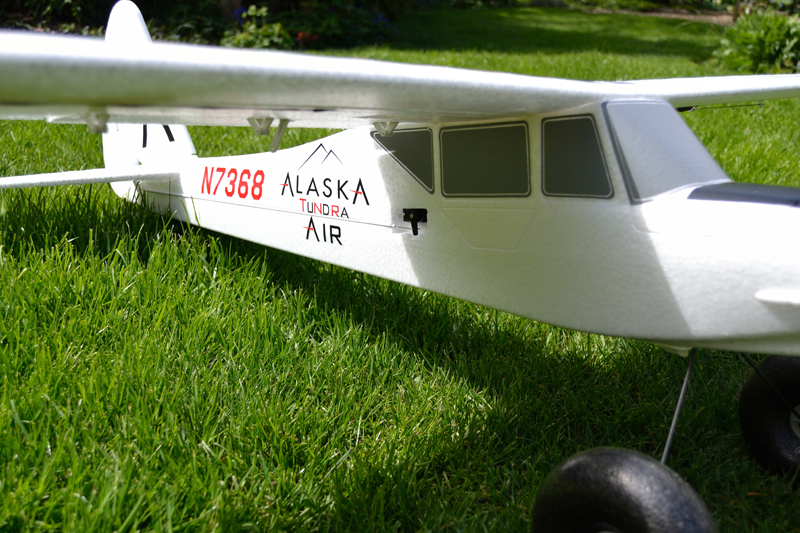
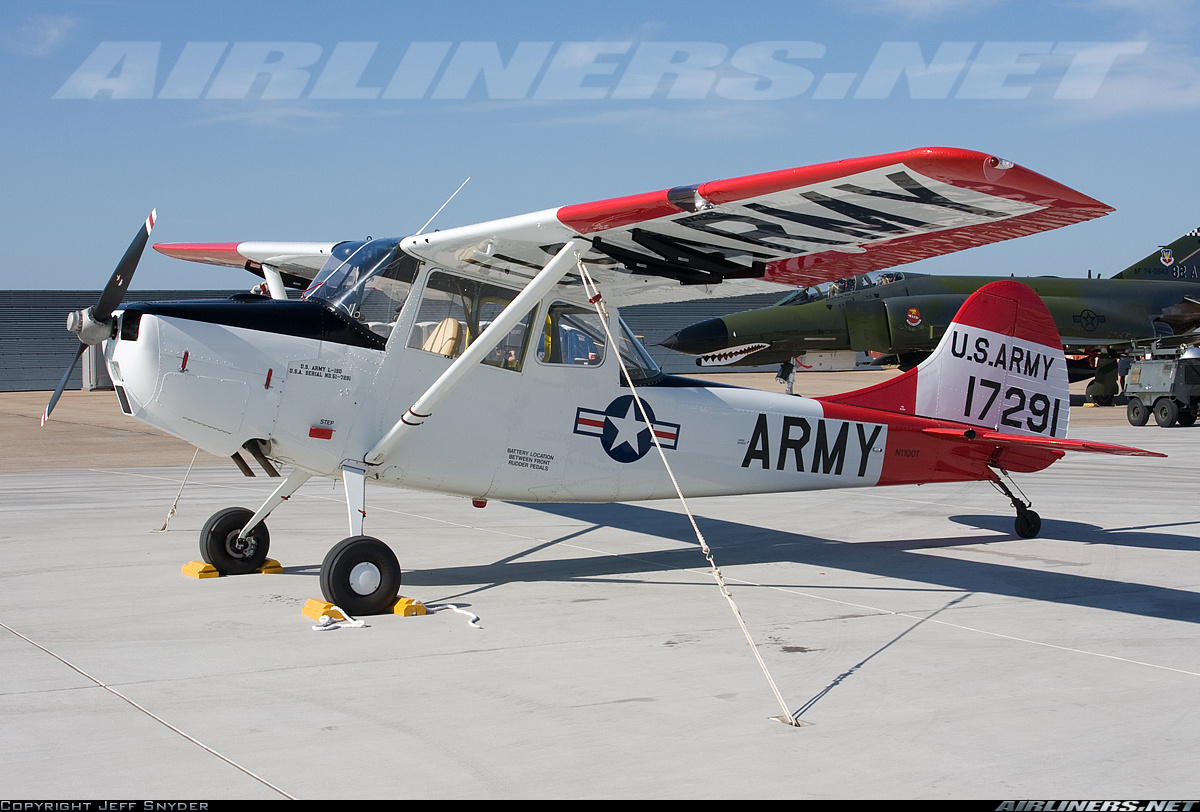
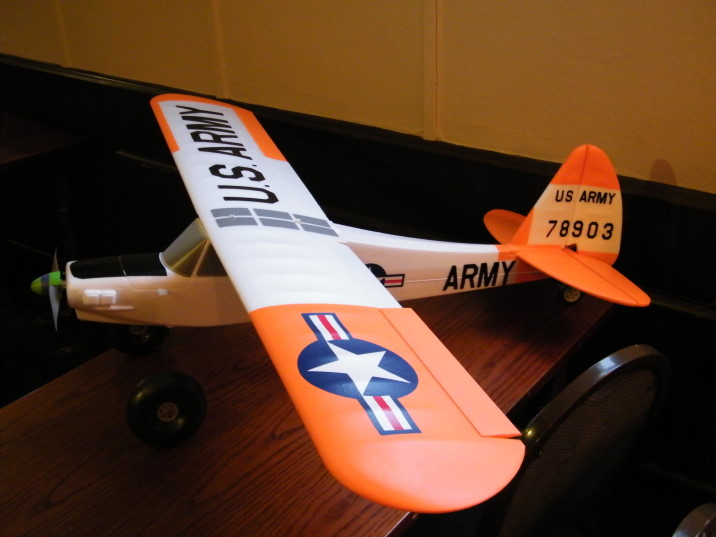
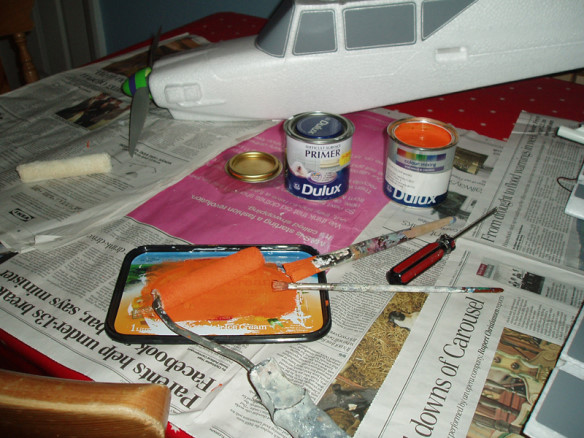
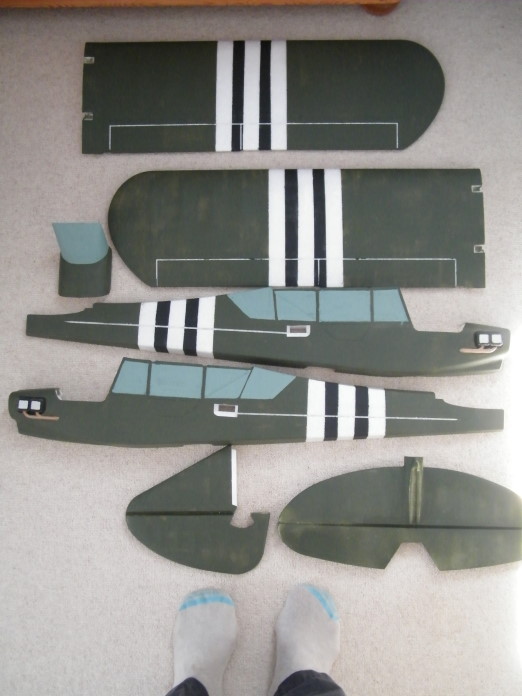
Id like to share my experiences with the paintings and markings for my Fun Cub. Ive watched Adrian Sharpe fly his on floats at Longham for the last three months, and envied the easy of transport, lack of fuss and very good flying qualities of his plane. And its resilience: floating back to shore upside-down (again) with everything intact and ready to fly off immediately brings home to me just how fragile my self-build models are! In the end I could resist no longer and bought one from Channel 4 (a discount is offered). Now remember, this is just for fun! Does your FC look like everyone elses? With a couple of hours work and a very simple scheme you can transform the look of it I used Dulux Emulsion (Latex) paint mixed to a specific RAL number at the local B&Q store and asked Tim Calvert to make the markings. It isnt an exact scale model of course, just a cartoon version of the J4 as used by the Allies during WWII but it is pretty close and if you half close your eyes, it could just about be a J4. The boys at Multiplex have done a remarkable job! The nearest whole number scale is 1/8th and Tim based his marking set for my FC on the Maurice Brett drawings in the Aircraft Archive series. I wont cover the assembly of the model enough has been written already and the box instructions are good but just where Ive departed from them. The model is made from Elapor and first job is to clean off the release agent, a sort of waxy surface to the foam. Multiplex make a special primer (which I suspect is ethanol denatured alcohol) and this is used on a cloth to clean off the wax. They recommend immediately removing the residue with a paper towel but I found this to be impossible as the paper merely picked up on the sticky gunge in large clumps. All I did was to wash off the residue using warm water and then dry the surface prior to painting. The paint I used was a 250 ml tester pot (Dulux in my case) which can be mixed for you at any paint store. All you need is the RAL number of the colour. Olive Green is RAL6003 and if you prefer a slightly darker colour, the Olive Drab used by the US forces is RAL6022. If you want to make your Fun Cub into an RAF Taylorcraft version, the colour RALs are on Tims website www.modelmarkings.com . The cost of the mixed paint is ridiculously low, a mere £2.68 for a tin that should last you for years. You can brush it straight from the tin, thin it with a mix of water and car screen fluid and spray it, or just roller it on with one of the very cheap rollers from the same store you got the paint. I cut mine down to about 30mm wide so as to get better control of where the colour went. I went a bit further and added invasion stripes and I used ordinary masking tape, but it has rather too much grip. One of the low-tack tapes might be better. The windows are painted on from Tamiya light blue and are easily extended to the military outline from the civilian pattern on the model. A few details can be added like the engine picked out in black and silver and the cooling slot blacked out, but the surface finish of Elapor discourages fine detail, unless you are prepared to use lightweight filler to close the grain. I think the extra painting effort has been well worth it, including the odd bit of detail like the struts (fixed at the wing with leaf hinges, but banded at the fuselage after a number of solid fixing failures). The additional weight is hardly an issue with a plane this tough and agile. The final gilding was to make a set of floats. These have been so successful and ROG (rise off grass) so easily that I dont really intend to change back to the wheels. Ill have a Wot 4 E for that just dont tell Wendy. The floats are made from 3mm and 6mm depron to a very simple design, with liteply reinforcement at the strut attachment points. The wire bending was the hardest part. I used some bright 2mm steel wire I got from Channel 4 and although the rear strut was fairly easy, the front one was more complex and took two goes. After a quick test flight at Strawberry Field I boxed up the model and took it to Canada where it met a number of other FCs, had 47 5-minute flights, two of them ending in the water upside down and one of them in the only real crash of the holiday which took all of five minutes to repair. Although the model is expensive in its raw state, it is very, very good fun. What more could you want? Time Calvert makes a number of sets of markings for this model and you can see the variations on his website www.modelmarkings.com . His prices are very good indeed and there is a discount for Club members. You can see the examples below. |

|
|
||||||||||||||||||||||||||||||||||||||||||||||||||||||||||||||||||||||||||||||||||||||||||||||||||||||||||||||||||||||||||||||||||||||||||||||||||||||||||||||||||||||||||||||||||||||||||||||||||||||||||||||||
|
[Home] [Chairman's Chatter] [Editorial] [Club Meetings] [Instructors] [Fun Cub] [Goodbye Terry] [Slope lift] [Model Shops] [Chilliwack 2012] [Results] [Club meetings] [tailpiece] |