|
|
||||||||||||
|
Christchurch and District Model Flying Club |
|
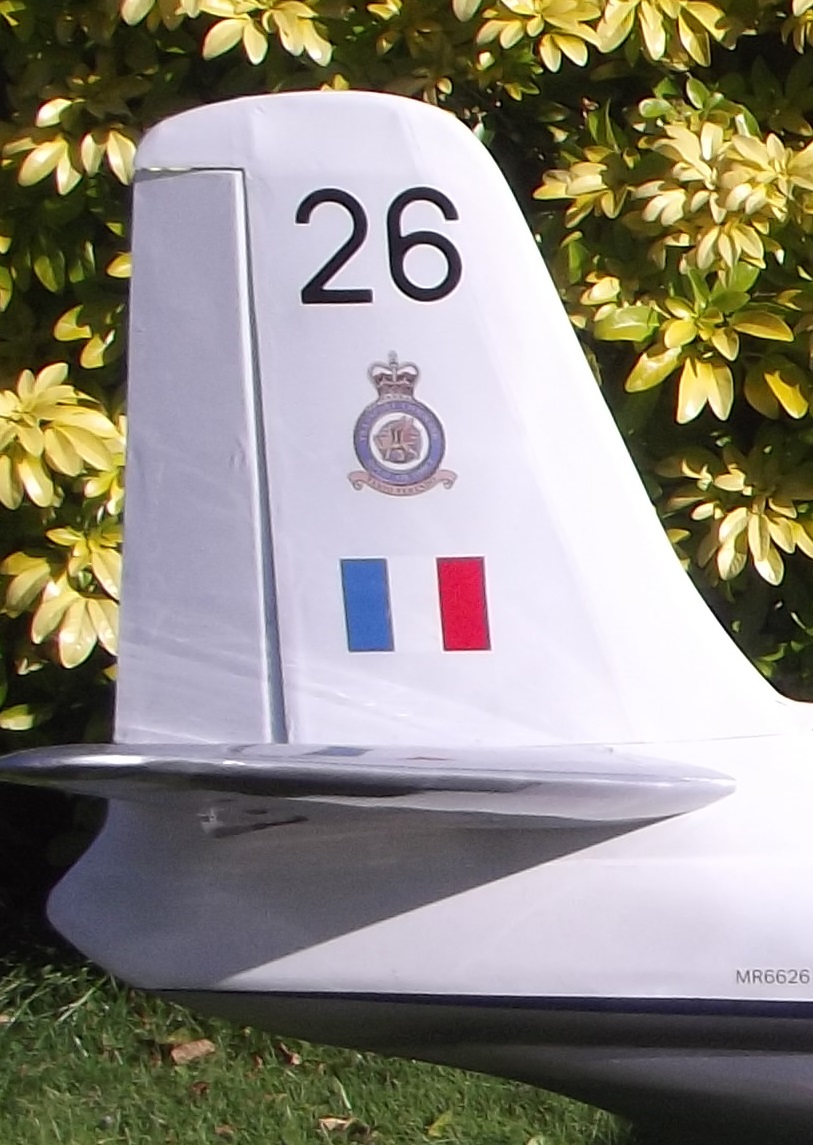
DRY TRANSFER MARKINGS—AN UPDATE by Mike Roach Back in 2006 I wrote an article for AMI about using dry transfers for model aircraft, Things have moved on a bit since then, so here’s some better information. SOURCES. Ever since Tim “Model Markings” Calvert burst onto the scene there has been little call for personalised markings, because he can do so much so easily. But there are times when I need to change marking size or location, or make some small text changes, where dry transfers are quicker and easier. RC Groups: Scale Kit/Scratch Built thread has a sticky called “Post Scale Decals for Downloading”. You can search the thread for specific markings. MS Windows can draw shapes such as roundels, fin flashes etc. What would we do without the internet?—the RAF Transport Command badge on my Princess was found by typing in what I wanted and saving the result as a jpg, then printing onto white dry transfer paper. The fin flash is also DT paper, but the 26 is from Tim. MAKING MARKINGS The markings are made using Microsoft Word shapes (Insert/Shapes tab on the latest MW Word) and various Fill, Line and Font colours. Lettering can be inserted in a Text Box and sized using the Font Size (try 100 at first). Different Fonts can be explored to get close to the real thing. Ariel Narrow is about right for British WWII codes and serials. The text box can be filled with colour to (almost) match the aircraft main colour. Red codes on Black fill for a matt black aircraft is perhaps the most successful, but equally good is text on white eg for the Sopwith trademark. GROUPING AND CHANGING SIZE Individual Markings are “grouped” (right click on a marking and see “grouping”). This allows the whole marking to be changed in size or aspect in one go. To do so, right click on the marking, go to Format Object and click the Size tab. Enter the desired width and height in cm and click OK. To change the proportion of the components of a marking (eg to enlarge the red disc), right click the marking, click Grouping and then Ungroup. You can then change the dimensions of any of the components of the marking. To re-group the components, press the shift key and click each in turn, then right click and click Group then Regroup You may find it difficult to get the discs centred exactly if you make very small changes. The easiest way to do this is to enlarge the grouped marking to a large number (eg 15cm) where each component is a whole number (eg Blue 15, White 9, Red 3). When centred, the components can then be grouped (hold down Shift and click each component in turn) and the whole thing resized. With a bit of practice, USA, Russian, German and most other markings can be approximated. Have a go, or let me know what you would like and I’ll see what I can do – files can of course be sent by email or printed versions by post. PLAIN PAPER PRINTS Markings printed onto thin copier paper can be very effective when used on profile or semi-scale models, where the appearance of the marking deceives the eye into seeing a better finish than actually exists! They are also very cheap and a good way of “proofing” your finished markings. Simply cut the marking from the sheet using a sharp knife, scissors (or “Olfa” cutter – see below) and stick them to the model using Pritt or similar glue stick. Make sure the glue goes right to the edge of the marking or it will lift and spoil the illusion. Naturally, the white areas of the markings will be white on the finished model, hence the need to cut the markings out exactly to the outside edge. CRAFTY COMPUTER PAPER Inkjet Waterslide Decal Paper This paper comes in clear or white with comprehensive instructions (please read them!). You still have to cut out decals on the white paper, but you do get the white parts of the decal, white. USING AN OLFA CUTTER FOR ROUNDELS It can be difficult to cut out roundels by hand. The answer is to use an Olfa circle cutter (I got mine at Bookends in Christchurch, but any good stationer should have them). You can’t just put the point in the centre – you’ll damage the transfer – so some sort of rest is needed. I use a set-square. Set the cutter for the right radius, taking into account any white edge to WWI roundels. Lay the acute-angled end of the set-square over the centre of the roundel and by trial and error, find the exact centre of the marking, then cut the portion of the circumference that you can reach. Re-site the set-square so that the uncut part is uncovered and the cutter exactly follows the previous cut line, and complete the cut. Just the roundel part of the transfer should float free when dipped in water. Waterslide Decal paper for Inkjet printers from www.craftycomputerpaper.co.uk Mike |
| [Home] [Chairman's Chatter] [Tailpiece] [Cold War Worrier] [Working with CAD] [Dry Transfer] [End of the Line] [The Archive] [Fly Diary] |
