|
|
|||||||||||||||||||||
|
CHRISTCHURCH AND DISTRICT MODEL FLYING CLUB BMFA affiliation no. 2581 |
|
BUBBLE DANCER AND LOST FOAM MOULDING BY CLIVE SPENCER
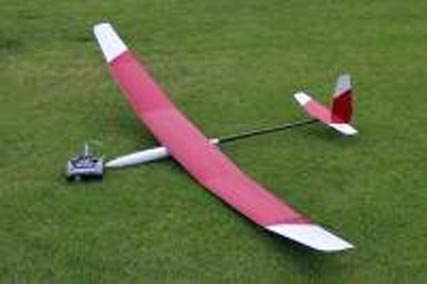
I originally stole the idea from Paul Yansen who used to supply plans for PSS models in the original Quiet Flight Mag before it was amalgamated with QF & Electric International. He wrote an article for that mag on how to make foam moulds & form the fuses with them. The first fuz that I made was of my 50” electric Airacobra some seven years ago, which still hangs on my model room wall. I had been toying with the idea of building a large competition glider for some time & found some of Mark Drela’s free plans on the Charles Rivers Web site, http://www.charlesriverrc.org/, one of which is the Bubble Dancer. The first thing to do is make templates of the plan & side views of the fuz. Then cut a block of foam to the exact width, height & length. See below.
Transfer the side elevation to the block & cut it out, then do the same with the top template. If the section is more complex, some section templates will help to arrive at the correct shape. Make sure you maintain the centre lines at all times. If you loose these, the shaping will get away from you.
Having achieved the final male mould shape, you now have a decision to make, as the type of resin to be used now dictates how you must proceed. If you decide to use Epoxy resin then you need to do no more to the mould, as epoxy does not affect the foam, also it does not smell & has a slower curing time. The down side is that it is expensive. If on the other hand you can use cheap & cheerful Polyester resin, the same stuff used for car body repairs & purchased at B & Q or Motorist Discount centres, you will have to protect your beautiful foam mould from the resin, which will eat it away at an alarming rate. The way to do this is to cover the mould with that brown plastic parcel tape also purchased from the above, and then use a wax polish over the top as a release agent. The plus side of this resin is that it is cheap & readily available, the down side is the awful pungent smell which will bring Erindoors down on you like a ton of bricks if you do this in the house. So be warned, I know from bitter experience. Having got to this point it is a good idea to decide how you are going to support the mould whilst you apply the cloth and resin. I usually put a dowel of some sort in the mould so that I can support it in a vice. Before you start mixing the resin be warned, glass fibre is a terrible irritant if allowed to touch bare skin also the resins can be very toxic. YOU MUST WEAR PROTECTIVE CLOTHING OVER ALL BARE SKIN & WEAR A MASK & GOGGLES WHEN SANDING OR MIXING THE RESINS. GOOD VENTALATION ALSO HELPS. We are now ready to apply the first layer of cloth. Having cut the cloth to cover the mould you can use a very light spray of picture mount adhesive to the cloth & lay it over the mould. Try to achieve a reasonably smooth finish. The resin can be thinned 10 % for this first coat using Toluene or Evostik Adhesive cleaner. Apply with a stiff brush & work well into the cloth, you can see when this happens as the cloth becomes opaque.
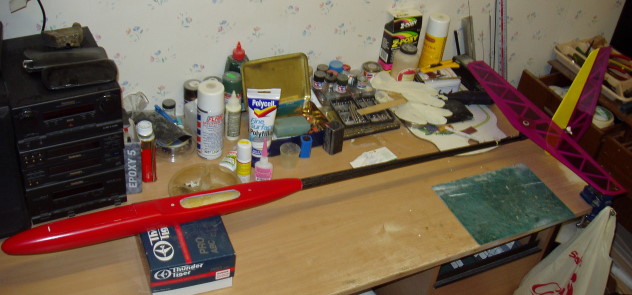
The next stage is to cut the following layers of cloth for the finished fuz. Try to ensure that the seams overlap & do not coincide with one another as this will weaken the finished mould. The number of layers depends on the application. For example, the Air cobra has 2 layers of 2.5 Oz cloth & a final layer of 1 Oz cloth. The bubble dancer has 4 layers of 2.5 Oz cloth due to the loads applied during High Start and winch launches. The original BD fus only has 2 layers of Kevlar & is lighter than mine but costs a lot more, so you pays your money & takes your choice as my old granny used to say. We should now have something that looks like this.
Finally, because we are using a male mould which will have a rough surface we need to clean up the cured mould and give it a final coat, a mixture of resin & micro balloons. Having put this coat on we now have to sand it down to achieve our final finish thus.
The final act is to cut out the apertures that your model requires & remove the original foam core. There are various ways of doing this, the easiest is to wait until Erindoors is out shopping for your dinner & melt the foam out using a solvent of some kind. I have been told that some people actually put the mould into the oven & melt the foam out, but I have not tried this. Unfortunately, this leaves a very sticky mess inside which has to be washed out & dried. After which the inside of the mould can be sanded to remove the rough surface.
The finished fuzz came out at 4.5 oz where the Kevlar one was 2.5 ozs, but I reckon you would not know the difference on a 3 metre sailplane and for a little work you have saved yourself about £50. The glass cloth & resins all can be obtained at Channel 4 Models, or at Cherbourg Model Express Tel 0495-774763. |
 |
|
[Home] [Contact Us] [Join Us] [Renew Membership] [Committee stuff] [Calendar] [Techniques] [Results] [Newsletter] [Wx Comp League] [C&F Comp] [Projects] [Bubble Dancer] [Vulcan] [Gallery] [For Sale] [Links] [Harry Spotter's] |


