|
shorts tucano
by Tim Calvert
 |
My Tucano is based on the 2003 RCME Free Plan by Nigel Hawes and is the 45 Inch version.
It is solid balsa construction and uses his trademark flat plate wing Profile. It was a very successful design, excellent easy flyer with many built from scratch and in kit form, and was also the basis for a version which he used to achieve a Guinness Record Breaking cross channel flight from Dover to Calais, using a enlarged 54 inch wing to support the massive battery load need for the 22 mile flight!
Construction stated in 2004 (!! - Ed) and the Canopy and part completed Wings have been looking at me gleefully from the cupboard for years, as construction halted when I went to work abroad shortly after starting.
The cold winter and hence cold uninviting garage had slowed the Ivan Twin Otter build, and relegated to the warm kitchen, finishing the Tucano was a more inviting proposition in the warm kitchen and not requiring by 6 foot building board!
The build sequence is well documented on RC Groups and on the Web, is straightforward and not difficult being solid balsa construction.
I deviated from the plan in two areas;
- Deleted the removable Motor hatch and made a ply rather than Balsa from Bulkhead with a hole in it to feed the motor through, this results in stiffer from end and is based on tips from the many RCgroups build threads
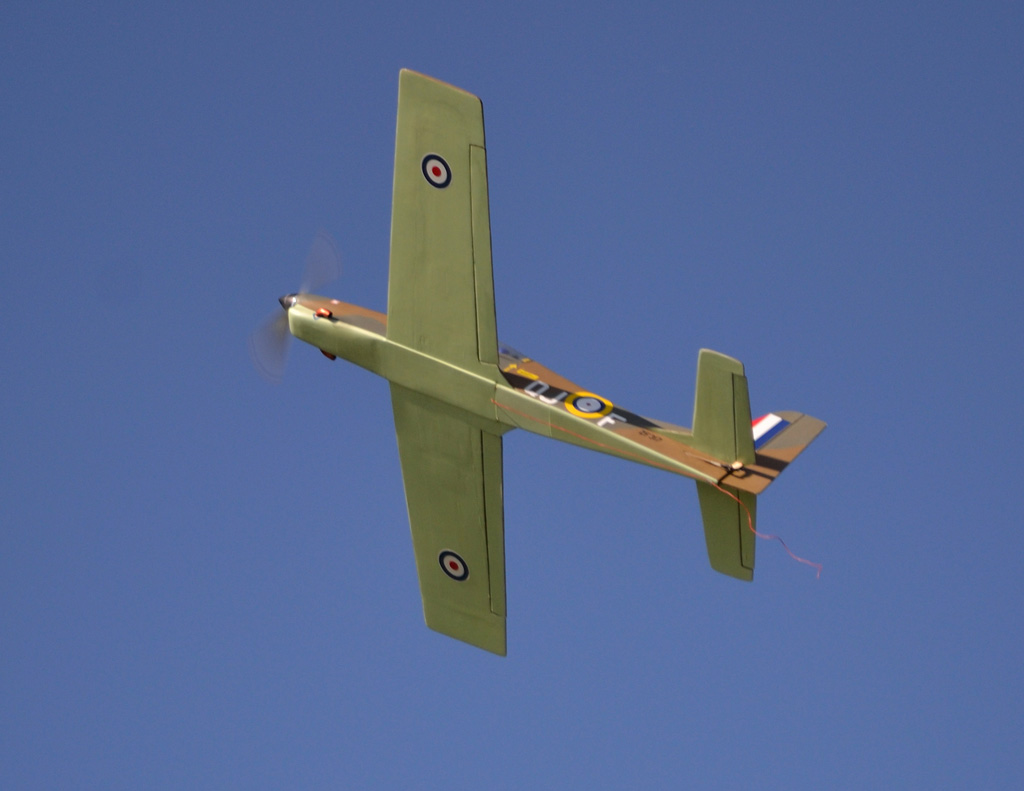
- Made the wing with a square flat section - see photo, this was an idea from Hawes later designs, and allows a better 'fix' to the fuse rather than try to line up a profiled angle section, again a weak spot on the original design.
- I have included the ply plates in the construction for a fixed undercarriage, but will probably just hand launch/belly land it
- Finish
The finishing was very much an experimental exercise using new materials and techniques.
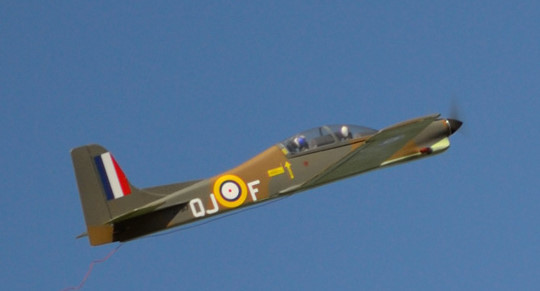
- The livery is based on ZF317 of the RAF Tucano Display Team and is the 2010 colours which are based on the Spitfire 1940 Camo scheme in celebration of the 70th Battle of Britain Anniversary and was one of the pair of RAF Tucanos on Display at last years Bournemouth Airshow.
- The Fuse and Fin was covered in .6oz glasscloth and Ronseal water-based varnish, after first applying a sealing coat of Sanding Sealer (home brew of very thinned clear cellulose and talc) which seals the surface (from the water based varnish which would otherwise raise the grain ) and provides a very smooth surface for the covering once. sanded. A further coat of varnish mixed with Micro Balloon, provides a lightweight finish and is used to seal the weave in the glass cloth, and then dry sanded to smooth off imperfections before painting.
- The wings moving surfaces and tail were covered in a clear Document laminating film (usually used for sealing photos in the ad industry) it a very light and thin covering, it is about half the thickness of Profilm. Its a self adhesive shrink film applied exactly like conventional covering film.
- The film surfaces are keyed with 400 grade wet and dry before applying a thinned coast of Ronseal water based difficult surface primer (used for plastics) using a foam mini roller
- The main colours, Sky for the underside and Dark Earth and Dark Green for the Camo were computer mixed for me in mini tester pots at the local Crown Decorator centre in Crown Matt emulsion, the Sky underside and Dark Earth were applied using a mini foam roller, I can also recommend Tamiya masking tape to provide a low tack bleed free mask, used between the Dark earth and Sky. The Dark Green Camo was then airbrushed on using a template lifted clear with a bit of thin foam sheet to provide soft edge finish in the camo. The Black Anti Glare and Wing Step areas were airbrushed Tamiya Acyclic.
- The detail graphics were made using a new Dry Transfer process (5 part sheet!) printed up on the computer, They apply very much like good old letraset and proved a very thin and impressive graphic. I am getting better with this technique ( a learning experience as they say!!!) as there are some very definite dos and don't to get it right! And plenty of Don't moments!!
- The whole plane was sprayed with thinned coat of Matt Ronseal Water based Varnish, to seal in the Graphics and Matt emulsion.
- The Squadron markings and Roundels are computer Cut Vinyl Graphics, the roundels layered up sheets of the various colours required, and sprayed with in an ink jet sealing lacquer to provide a matt finish.
- The removable canopy weighs in for only 1.6 ozs for the finished item, not too bad for something which is near 12 inches long, complete with pilots and interior. The canopy is from Vortex Vacforms as are the pilot figures (flight Lt Tom Bold and Navigator), both commissioned as part of the original RCME build article. The interior is a few bits of pink foam painted matt black with a ' Photoshopped' set if instruments printed. Not very detailed, but sufficient cues (as they say in the Auto Industry) to mark it out as a Tucano with its distinctive central cabin divider and ejector seats.
- The distinctive Tucano exhausts are balsa painted up with artist acrylic, even fooled my artist daughter (whose paint I borrowed) who was convinced they were made of copper! The fuse heat sheild surrounds are printed dry transfers, but for some reason the gunmetal grey comes out a bit blue, even after many tries, must be something to do the the ink chemistry and the Dry Transfer paper. A bit of artistic licence in positioning the exhausts to prevent them being otherwise ripped off on first belly landing!
The target build weight was 40oz, and the final Tally was 41oz AUW, so not bad, well under the 48 - 54 oz weight of the 2003 builds, such is the development in battery technology.
· Wing loading 16.4 oz per sq foot
· Motor is AXI 2820/10 outrunner producing 365 watts @ 35 amps
· Battery 3000 mah 3S Lipo
· Prop APC 11x5.5e, spinning at 9200 rpm producing 60oz thrust
· 14gm Metal gear 2.2kg Mini Servos
· Hobbyking 50amp ESC, with seperate 5 amp BEC
The Hawes design is scale like, lots of concessions to flying qualities and easy build, but has all the cues that make it the very distinctive Tucano Shape, the finish has exceeded my expectations and is very pleasing, as usual I always to concentrate on the mistakes and errors!! but in the end this a model to fly!!
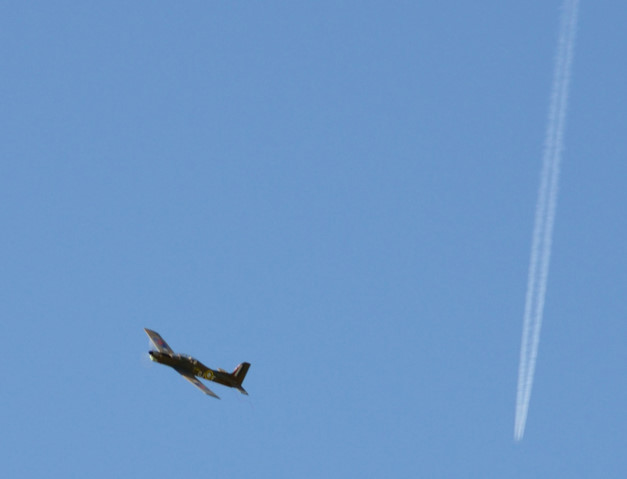
First Flight May 2011.
Trevor kindly maidened the Tucano at Stanpit this morning. The weather window was kind, blue skys and wind light but just beginning to gust.
Doggy walkers were sparse, so last minute pre flight checks, and a debate whether it was to be an overarm or underarm lob.
Overarm won out, and on 2/3 throttle it was off with no drama.
 |
One click of down was all the trimming needed, stall was complete non event. Trevor reported it flew well, roll rate was acceptable and certainly responded well to the controls.
A few glitches (still on 35 mHz!) were encounted, nothing serious, confined the need to complete the TX conversion to 2.4 gHz (still in its box at home!!).
Post flight analysis, suggested a slight move forward for the CG, and a hairline crack developing behind the rear wing in the area around the rear servo hatch, I will reinforce the area with a 1/64 ply skin around the servo hatch, it a bit of a known weak spot and in retrospect probably used too light a grade of balsa in this area, it will stand up the belly landing better.
The battery only took 600 mAh, less than 25% capacity suggesting long duration
Tim
|